Laser Fault Injection on a Budget: DEFCON 33 Showcase
Posted on Fri 15 August 2025 in Projects
Introduction
Following my work on bypassing the Secure Boot feature of the RP2350 microcontroller using laser fault injection (see the relevant article for more details), I was honored to be invited to the 33rd edition of the DEFCON convention by Raspberry Pi.
There, I showcased my budget-friendly “Laser Fault Injection Platform” and gave two small talks discussing its design.
This short article provides access to some of the materials presented at the conference, including slides, and additional source code.
Slide Deck
The slides presented during the two small talks I gave are available here: Budget-Friendly Laser Fault Injection: Showcasing a DIY Rig.
This presentation focuses on the design of the “Laser Fault Injection Platform” itself rather than on the analysis of the RP2350’s bootROM.
Simplified Target Preparation
When exposing the silicon die of the target RP2350, the exposed pad of the QFN package must be removed.
Unfortunately, this pad is the only ground connection to the device. To restore functionality, an alternative ground connection is required.
In my previous article, I proposed reconnecting ground with conductive epoxy. Small fragments of conductive material (likely severed bond wires) sometimes remain accessible.
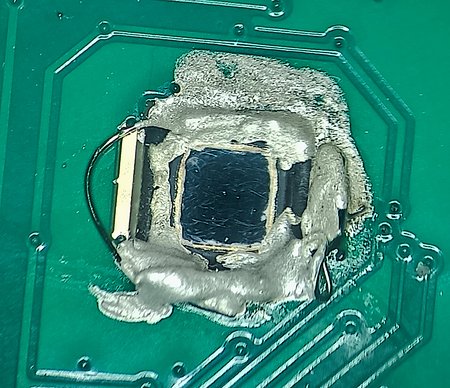
However, this method is rather tedious, and the success rate when preparing multiple units is rather low.
While preparing more targets for the conference, I discovered a simpler approach.
The RP2350 exposes a VREG_PGND pin used by its internal voltage regulator. While this pin doesn’t offer a low-impedance path to ground, measurements still show a resistive path of to .
That’s too high for normal operation at the nominal supply. However, by overvolting DVDD from to , we can overcome the extra resistance and allow the system to boot.
In practice, the previous introduced “Main Carrier Board” only needs a minor modification: replace regulator U3 (TLV70311DBVR, LDO) with TLV70318DBVR ( version of the same LDO).
![]()
Interactive 3D Render & Design Files
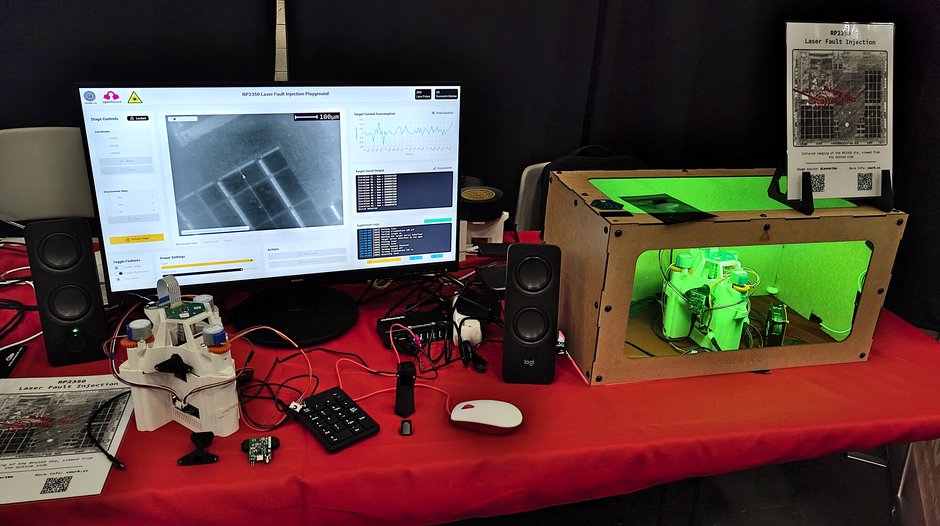
“Laser Fault Injection Playground” Interface
A custom graphical user interface has been developed to showcase the features of the “Laser Fault Injection Platform”.
This interface is essentially a web application running on the Raspberry Pi single-board computer that powers the platform.
It allows to:
- Control the XYZ positioning stage
- Control the infrared LED used to illuminate the die of the target
RP2350 - Display the output of the camera, showing die features. This includes a post-processing step to improve image quality
- Configure the output power of the laser pulser
- Pulse the laser
- Load firmware onto a target
RP2350and monitor its status to detect successful glitches
A few people have expressed interest in this interface, so I’ve made the source code available on GitHub.
Warning
The code was hacked together right before DEFCON. It’s just good enough for this demo and is probably not suitable for anything else.